This new Archetype was introduced in Next Challengers and they consist of EARTH-Machine monsters the “main engine monsters” are either LV 6, 7 or 8. It’s the first Pendulum archetype that I consider as competetive. They have the thing in common that they can be Normal Summoned without a tribute and become LV 4 with an Original ATK of 1800 ATK when summoned like this (except Scout that is only our searcher card). BUT: Same as Beast King Barbaros their ATK will reset to their original printed value when their effects are negated for example when Skill Drain is face-up on the field and even better is that if Skill Drain or the effect negating effect stops their ATK will remain at their original printed value.
Why’s this deck so good? Well first you have several searchers that can search you everything you need, making it super consistent. Secondly you have access to almost every good flood gate in the meta (Vanity’s Emptiness, Skill Drain or Shadow-Imprisoning Mirror in the side) and suffer almost no drawback from using them, while most of your opponents will be crippled when they face these flood gates you are using. It’s a pretty easy to learn deck, but it’s not autoplay as some people suggest, especially in game 2 and 3 where you have to be careful not to get your Scouts and Skill Drains blown up by Fairy Wind or other Spell and Trap hate that they sided in.
How do Pendulums work? First you have to have Pendulum cards in your Pendulum Zones. These Zones were introduced with the Yuma Starter Deck and they are located between the Extra Deck and the Field Spell Zone on the left side and between the grave and your deck on the right side.

Each Pendulum card is multicolored (the upper half is orange/yellow, while the lower half is green; yellow means its monster part is just a normal monster, if it’s orange it has a monster effect too).
You have to activate 2 Pendulum cards in your Pendulum Zones, then you can Special Summon any monster from your Hand AND/OR face-up on your Extra Deck that has a level in between the Pendulum Scales (so if they are 9 and 1 like above you can Special Summon monsters that have Level 2, 3, 4, 5, 6, 7 or 8). Pendulum Scales are the numbers that are in the middle under the Blue/Red arrow, at the moment there are only Pendulum cards whose scales have the same number on both sides.
So let’s have a quick glance at the build that I’m playing in real life at the moment. Sidenote: I don’t own Vanity’s Emptiness and don’t want to purchase a playset without any big event that I want to attend as I already have my WCQ for the European Championship and I speculated that Vanity’s Emptiness might get hit, so I sold all my copies.
Why does nobody play Qliphort in Japan although it has good cards against Nekroz? – My guess would be that nobody wants to play it because it’s a budget deck and all cards are just common or rare, might be the same as why not many people play U.A. here even though it’s a decent Tier 2 deck.
Qliphort (pre SECE)
Decklist:

Monster (12):
3x Qliphort Scout (LV 5)
3x Qliphort Disk (LV 7)
3x Qliphort Carrier (LV 6)
2x Qliphort Helix (LV 6)
1x Performapal Trampolynx (LV 2)
Spell (22):
3x Pot Of Duality
2x Upstart Goblin
2x Forbidden Chalice
3x Mystical Space Typhoon
2x Night Beam
1x Raigeki
1x Enemy Controller
1x Snatch Steal
1x Book Of Moon
3x Summoner’s Art
3x Saqlifice
Trap (6):
1x Bottomless Trap Hole
1x Compulsory Evacuation Device
1x Solemn Warning
3x Skill Drain
Extra (15):
1x Gagaga Cowboy (R 4)
1x Number 80: Rhapsody In Berserk (R 4)
1x Abyss Dweller (R 4)
1x Daigusto Emeral (R 4)
1x Lavalval Chain (R 4)
1x Evilswarm Exciton Knight (R 4)
1x Steelswarm Roach (R 4)
1x Diamond Dire Wolf (R 4)
1x Number 82: Heartlandraco (R 4)
1x Castel The Skyblaster Musketeer (R 4)
1x Number 101: ARK Knight (R 4)
1x Number 103: Ragnazero (R 4)
1x Number 85: Crazy Box (R 4)
1x Volcasaurus (R 5)
1x Gaia The Thunder Charger (R 7)
Side (15):
1x Apoqliphort Towers (LV 10)
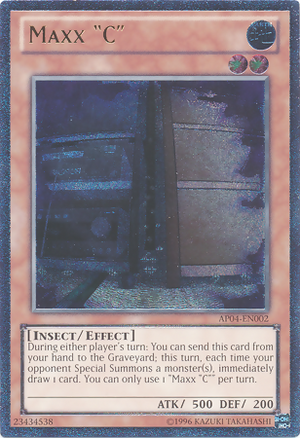
3x Maxx “C” (LV 2)
3x Spell Shattering Arrow
2x Chain Disappearance
2x Shadow-Imprisoning Mirror
1x Qlimate Change
1x Magic Deflector
2x Wiretap
Card explanations:
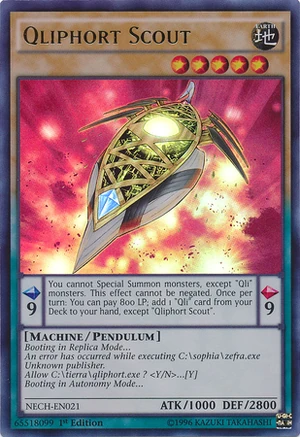
Qliphort Scout
-
Pendulum Effect
-
You cannot Special Summon monsters, except ‟Qli” monsters. This effect cannot be negated. Once per turn: You can pay 800 LP; add 1 ‟Qli” card from your Deck to your hand, except ‟Qliphort Scout”.
-
Monster Effect
-
Booting in Replica Mode…
An error has occurred when executing C:\sophia\zefra.exe
Unknown publisher.
Allow C:\tierra\qliphort.exe ? <Y/N>…[Y]
Booting in Autonomy Mode…
This card keeps your deck running and that’s what’s making it good. You have to pay 800 Lifepoints to get any Qli card that you want/need at the moment. The only downside of this card is that you run out of Lifepoints pretty quick when you combine it with other cards where you have to pay Lifepoints (Skill Drain, Solemn Warning). Scout can be searched with Summoner’s Art or Saqlifice. Upstart Goblin and Duality is there to make sure that you get Scout as soon as possible. I don’t play Odd-Eyes Pendulum Dragon anymore, because it is far too slow. Just imagine a Hand where you have no Scout and just an Odd-Eyes with several backrow cards and no monster. In this case you would have to wait 1 Turn for a Scout, then have to hope that you draw either a monster or Saqlifice so that you can establish some field and then you have to wait for another turn to make a Disk play. If you don’t draw any of them you have to search for a monster, while hoping that he doesn’t have MST. That’s far too slow in this format… So it’s better to run some filler cards like Upstart Goblin or Pot Of Duality instead of Odd-Eyes, that can possibly net you a Scout instantly or at least thin your deck out, in order to get Scout faster.
Qliphort Disk
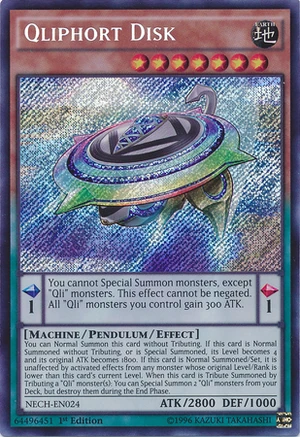
- Pendulum Effect
- You cannot Special Summon monsters, except “Qli” monsters. This effect cannot be negated. All “Qli” monsters you control gain 300 ATK.
- Monster Effect
- You can Normal Summon this card without Tributing. If this card is Normal Summoned without Tributing or is Special Summoned, its Level becomes 4 and its original ATK becomes 1800. If this card is Normal Summoned/Set, it is unaffected by activated effects from any monster whose original Level/Rank is lower than this card’s current Level. When this card is Tribute Summoned by Tributing a “Qli” monster(s): You can Special Summon 2 “Qli” monsters from your Deck, but destroy them during the End Phase.
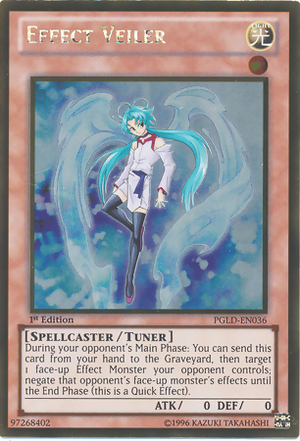
This guy is your OTK enabler, if you Tribute Summon Disk with at least 1 Qliphort monster you can Special Summon 2 Qliphort monster from your deck that are destroyed in your End Phase, but that doesn’t matter as you will either win the game anyways or have them ready for a Pendulum next turn in order to serve as Tribute fodder or to deal heavy damage. Don’t forget that he’s unaffected from all monster effects that have a lower Level or Rank, so that means that for example all Rank 3 0r 4 Xyz’s can’t harm him. A nice addition is that all Qliphort monsters are unaffected by Swift Scarecrow, that every Burn or other troll decks is using and also Effect Veiler cannot affect Disk. In almost all cases you’ll want to Special Summon 1 Carrier and 1 Helix, as you don’t want to waste too much resources (Like wasting all Carrier), except when you want to go for game and know that you have a Skill Drain set, then you will probably summon 2 Disk, or when you just don’t have anything else in your deck.
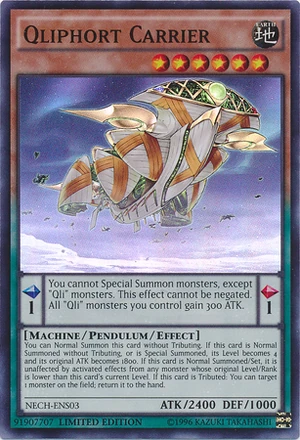
Qliphort Carrier
- Pendulum Effect
- You cannot Special Summon monsters, except “Qli” monsters. This effect cannot be negated. All “Qli” monsters you control gain 300 ATK.
- Monster Effect
- You can Normal Summon this card without Tributing. If this card is Normal Summoned without Tributing or is Special Summoned, its Level becomes 4 and its original ATK becomes 1800. If this card is Normal Summoned/Set, it is unaffected by activated effects from any monster whose original Level/Rank is lower than this card’s current Level. If this card is Tributed: You can target 1 monster on the field; return it to the hand.
Generally you want to start with this Normal summoned guy on the field equipped with Saqlifice, especially when you don’t know what you’re playing against. As you can read above he can bounce a monster to the hand when he’s tributed, so Carrier is the one that will get rid of your opponents monsters for you to OTK him or at least deal some serious damage when you Tribute him equipped with Saqlifice for Qliphort Disk. I also play Enemy Controller because of this guy. The idea is to tribute him for Enemy Controller steal 1 of your opponents monsters while being able to bounce another one, so that you completely interrupt your opponents plays. It has worked for me so far, that’s why I’m still playing it like this.
In case that you have a special summoned Scout you can also bounce your own Scout to be able to use it again or you could bounce a Disk when there’s a Skill Drain face-up so that Disk’s effect will trigger and Special Summon 2 Qliphort Monsters from your Deck with full ATK while being able to search another monster for Saqlifice and being able to Pendulum Summon your bounced Disk + the card that you’ve searched for.
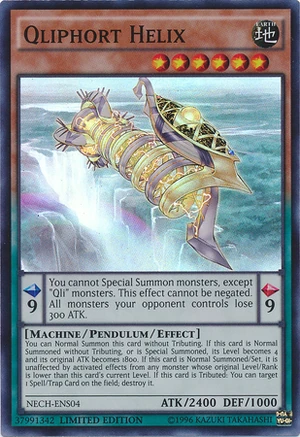
Qliphort Helix
-
Pendulum Effect
-
You cannot Special Summon monsters, except “Qli” monsters. This effect cannot be negated. All monsters your opponent controls lose 300 ATK.
-
Monster Effect
-
You can Normal Summon this card without Tributing. If this card is Normal Summoned without Tributing or is Special Summoned, its Level becomes 4 and its original ATK becomes 1800. If this card is Normal Summoned/Set, it is unaffected by activated effects from any monster whose original Level/Rank is lower than this card’s current Level. If this card is Tributed: You can target 1 Spell/Trap Card on the field; destroy that target.
Helix is the counterpart to Carrier, as he destroys Spell and Trap cards to ensure that there’s nothing to interrupt you from “OTK-ing” your opponent. Normally this card is better than Carrier in the mirror match, but except that there aren’t any advantages in using him against other Top Tier decks like Burning Abyss, Shaddoll or the upcoming Necloth archetype as almost every deck only plays chainable Spell or Trap cards or like Necloth barely any at all. In the mirror match you can destroy your opponents Pendulum Zones, that’s why you should search him instead of Carrier, except when your hand is capable to OTK him in the next turn, then you should aim to clear the field with Carrier and OTK him or else he will OTK you.
Like Carrier his only purpose isn’t only destroying your opponents s/t, but sometimes it’s wise to destroy your own Spell or Trap cards as well like a face-up Skill Drain that would otherwise block your Disk’s effect (just do this when you’re sure you can win, e.g. when he has no more backrow or you already know his backrow and know he has nothing in hand or deck that would allow him to come back).
Another time you would want to use Helix’s effect on your own cards would be when you want to Special Summon Xyz monsters, but the Qli scales would prevent that as every Qli monster prevents Special Summons except Qli monsters.
There were quite a few duels were I had to do this in order to call Abyss Dweller to keep Burning Abyss effects from activating in the grave (of course you want to have a spare Scout in your hand before you do this risky play). That’s one possibility to Xyz summon using Qli monsters, the other and probably better option would be using Performapal Trampolynx which will be discussed right now.
Performapal Trampolynx
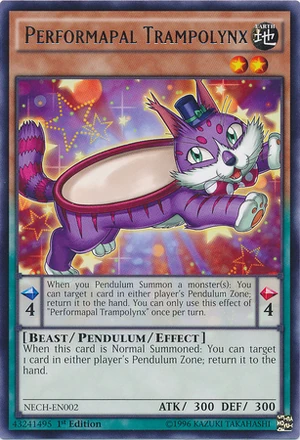
This is your only “monster” that isn’t a Qli monster, although you won’t use him much as a monster, but only as a Pendulum Scale. Trampolynx allows you to bounce a Pendulum Scale back when you Pendulum Summon monster(s). Normally you want to bounce your Scout back to use its effect one more time, but as already mentioned before you can also abuse this little cat to allow Xyz plays to use your Rank 4 monsters as a toolbox when needed, as you can bounce Scout and therefore releasing you from the restriction not being able to Special Summon anything besides Qli monsters.
Why am I only playing 1 copy of this awesome card? Well that is because it is a card that can only allow Power Plays, but it will suck on its own for example when you only draw this little guy without anything else and only Spells and Traps. Of course you would want to reduce that situation to happen as close to zero percent as possible. In addition to that you don’t want to draw more than 1 copy of Trampolynx, so just running 1 reduces these crap hands to a minimum, also you can win without this card as it is only a win-more card and not absolutely necessary.
Pot Of Duality
So this card that was a staple in many decks the last formats, didn’t really see a use in the Meta Decks for a long time except in HAT, but finally has a purpose here, too. Why’s that you ask? Isn’t this a deck that special summons like crazy? Well yes, that’s true, although not quite. 😀
Normally in your first turn you will only Normal Summon your Carrier/Helix and equip it with Saqlifice, that’s where Pot Of Duality will come in handy and net you a good backrow like Skill Drain or any staple or it allows you to search a necessary Scout that you might not have in your starting hand. With access to cards like Skill Drain or Vanity’s Emptiness this deck can play the grinding game quite well if you’re forced to, while you lock your opponent with the mentioned flood gates. You can just sit on your 2800 ATK beaters and take your time to take out your opponent while searching for good cards with Duality and locking your opponent with your flood gates.
Upstart Goblin
I only play 2 Upstart Goblin. You think this is bad and I should play 3? It is partially correct that 3 Upstart Goblin is better than just 2, but then you have to think about it that Upstart Goblin is just a filler card that thins out my deck. Why should I leave out good cards or cards that I absolutely want to play on purpose just to play 3 copies of a filler card? That’s my reasoning and I do fill up the remaining spots with Upstart Goblins and it does make the deck faster, but I think it fulfills the same purpose with 2 copies as with 3 copies. The percentage to get a card better is so small that it’s not worth leaving out a card that might win me a game. I wouldn’t play just 1 Upstart Goblin, as you probably won’t see it in all of your games, but 2 or more copies are just right to play.
Forbidden Chalice
That’s one of my tech cards and it’s working wonders so far. It will be one of your cards that can decide the mirror match and it can shut down all Flip effects that would trigger when you attack them while they are face-down. Of course you could Flip a Skill Drain pre-emptively, but then you would lock yourself out of Disk’s effect, so it might be wise to just let the Skill Drain stay face-down and only activate it when it’s absolutely necessary.
The ability to use this card offensively and defensively is amazing too, as it will reset the ATK and LV of your monsters to their printed value and giving them a 400 ATK boost on top. In addition to that the reset will stay permanently, and just to mention its awesomeness one more time, you can also use this against your opponent to interrupt his plays, too. Although it’s awesome 2 copies are more than enough as you also have your Skill Drain.
Night Beam
An almost forgotten card in the last format, but it’s more and more regaining its usefulness as Artifacts are vanishing and everybody trying to use only chainable Spell and Traps. Especially in the Burning Abyss match-up which is by far the worst one (Shaddoll Artifact was annoying too, but that problem disappeared with the limitation of Moralltach). I’m just maining 2 copies, but that might change from time to time (you should run 2-3 copies depending on the decks you will face).
Raigeki
A card that isn’t as broken as it was when it was released, as almost every monster will trigger their effects in this Meta when they go into the grave, but the good thing is you don’t really care much about that, if it enables you to OTK your opponent. Normally Burning Abyss (BA) will be able to Special Summon 1 Dante back with Cir and get a bunch of effects, but that’s it. You can get rid of the Dante with your Carrier effect while your opponent isn’t able to use Fire Lake anymore, one of the probably most annoying cards that BA has. If you have used some S/T removal before they will probably have nothing anymore or a Fire Lake that he can’t use anymore. Even against Shaddoll it’s good to have because the only one that can’t be destroyed is Winda and that card is almost no problem for Qliphort as you will bounce it with Carrier and only Special Summon 1 time a 2 monsters with Disk, the Pendulum Summon can be performed later after you get rid of Winda.
Enemy Controller
This card is just my tech card, I tried to use 2 copies but 2 were too much. 1 random Enemy Controller is just perfect for me, usually you want to tribute your Carrier/Helix to interrupt your opponent by stealing their monster and in addition to that with Carrier’s/Helix’s effect.
It also prevents your Helix/Carrier disappearing from Bottomless Trap Hole or similiar, as Enemy Controller is a Quick-Spell card and can be chained to tribute Helix/Carrier to steal one of your opponents monsters for you to Attack/Tribute. In a pinch it can change an opponents monster into DEF.
I would probably use Vanity’s Emptiness instead of this card if I had one.
Snatch Steal
There was a reason why this card was banned and it’s still good as you’ll be able to clear your opponents field for an OTK or just use the targeted monster for a Tribute Summon. If your opponent wastes a MST on this card, good for you then you don’t have to worry about them having much more MST’s for your Scout, that’s ’nuff said.
Book Of Moon

Book Of Moon is so broken against Burning Abyss as every other Burning Abyss monster will automatically self-destroy when there’s a facedown monster on their field, rendering them unable to do any big combo on that turn (face-down monsters are not considered as Burning Abyss monsters and all BA monsters have an effect that says that they will destroy themselves when there’s a monster that doesn’t have “Burning Abyss” in its name).
It’s also good in the mirror match as their tribute summoned monster will only have 1000 DEF that you can easily run over. The only match-up where you probably don’t want to use this card is Shaddoll, but even there you can flip one of their Fusions face-down to prevent some damage or to stop their attack.
Summoner’s Art
Now let’s finally look at the deck specific Spell cards, this is your card that searches your Scout, if you have the choice between this card and Scout (e.g. Pot of Duality) you should always add this card and then search for Scout as this will thin your Deck out and you don’t want to draw into a useless Summoner’s Art during mid-or late game assuming there is one.
Saqlifice
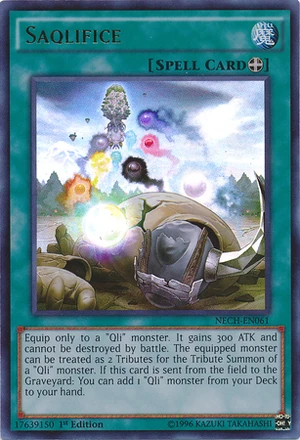
The last part of the core engine that keeps your deck running. As said above you always want to start with this card and a Carrier/Helix (preferredly Carrier). This cards gives your Qli monster a 300 ATK boost, prevents it from being destroyed by battle and when you Tribute Summon a Qli monster the equipped monster counts as 2 Tributes. In addition to that Saqlifice will net you a Qli monster when it goes into the grave. So all in all an awesome card. You will mostly want to add a back-up Scout or a Scale 1 Pendulum monster to Pendulum Summon after you used Disk’s effect, depending on your hand.
Solemn Warning
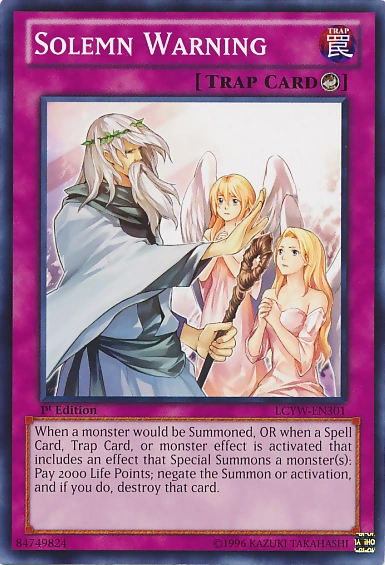
This card is a little bit controversial in the deck as 2000 Lifepoints are a huge amount in a deck that pays more than 800 Lifepoints every turn not counting the 1000 Lifepoints for Skill Drain. But it does have its use and I did throw out this card for something else, but I deeply regretted that decision in the tournament and wished I had a Solemn Warning instead, so now it’s a part of my deck again. This card sucks against Burning Abyss but can at least stop Cir from activating in your grave when you get rid of his field.
Skill Drain
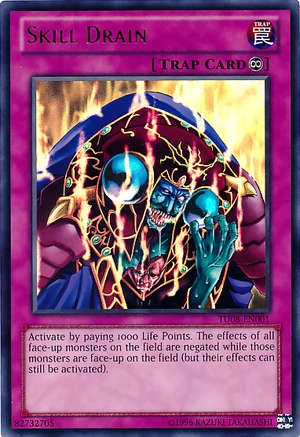
One of your best flood gates if not your best. As mentioned above the cost of 1000 in addition to the 800 Lifepoints you have to pay everytime for Scout are a huge amount, but normally you can end it pretty quick so that you don’t have to worry about that too much. The ATK of all your monsters will be reset to the original printed value if you activate this card making all monsters you Pendulum Summon or Normal Summon into 2400/2800 ATK beaters.
Side Deck Explanation:
I normally side out the 2 Upstart Goblin, sometimes 1 Pot Of Duality and depending on the deck some of the staples or tech cards, for example Enemy Controller or Bottomless Trap Hole against BA. This is what you have to test quite a lot to see what fits you the most against which decks and makes the difference whether you are a good player or not, you can always learn all combos, but these little decisions will make the small difference.
I don’t have that much problems against Shaddoll so I’m just siding Shadow-Imprisoning Mirrors, Wiretaps and a Qlimate Change for these matches most of the time depending on who goes first, if my opponent goes first I sometimes side 1-2 Maxx “C” instead of Wiretap.
Apoqliphort Towers
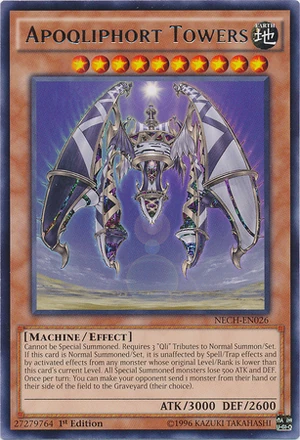
People first thought that this guy was your boss monster and it is a fact that he is pretty cool, but I’m still just playing him in the side deck, because you don’t want to draw Towers, but only search him when you can really summon him. In most of the cases if you can Summon this guy, you would have been able to win otherwise. The only match-up where he comes in handy is against Burning Abyss as they have nothing that can run over or get rid of him except having an Acid Golem and Giga-Brilliant and being able to activate Giga-Brilliant 2 times, which is pretty much non-existent. That’s why I only side this card when I’m facing Burning Abyss and even then I only side it in a game where I begin.
Maxx “C”
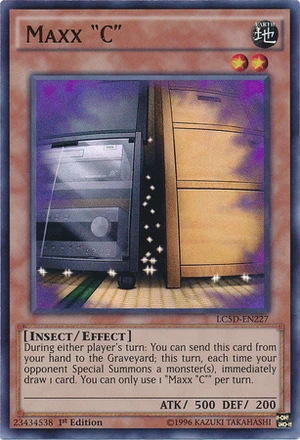
My favorite side card against Burning Abyss as they have to Special Summon a bunch of monsters in order to protect themselves and being able to activate Fire Lake or they will die pretty quick against Qliphort. Maxx “C” will allow me to draw my combo pieces like Scout, Saqlifice, Carrier and the Spell and Trap removal that I need for their backrow.
Spell Shattering Arrow
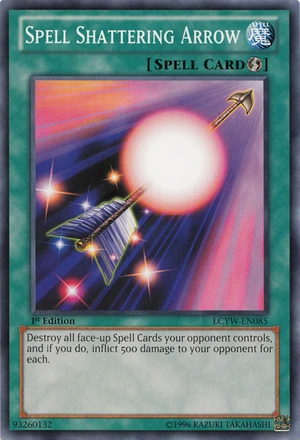
Of course this card is for the mirror match as it can destroy your opponents Scouts and other scales while also burning themfor some damage. The fact that it is a Quickplay Spell is even better as you can use it in your turn or set it and use it in your opponents turn. Spell Shattering Arrow is also good against Bujin, Madolche, U.A. Spellbook and several other decks.
Chain Disappearance
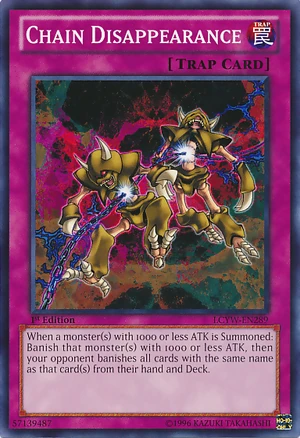
This is more than obviously a card against Burning Abyss and you should use it against either Tour Guide, Scarm or Graff, but don’t forget that you can also use it on Dante in a pinch. This card is also useful against Spellbook as it will reduce their consistency when you banish their blue boy, even though everbody says that blue boy is just there as a filler, but it actually allows them cycle through their deck really fast, so hitting it is a pretty ok. Also no more Spellbook Of Life makes it worthy.
In case of troll decks like Burn you can hit their Cardcars with this card which is pretty good, too.
Shadow-Imprisoning Mirror
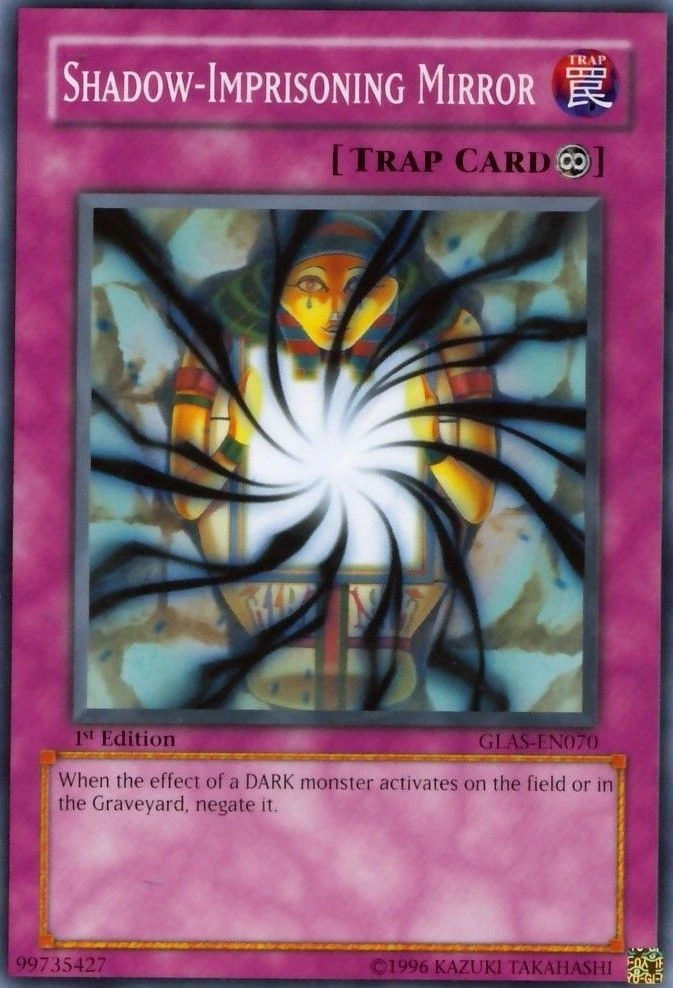
I always side the Shadow-Imprisoning Mirror (SIM) against Shaddoll and Burning Abyss, but against BA I only side it when I begin, if not then I side something else like Chain Disappearance or Maxx “C” as you will always be countered with Fairy Wind or similiar making it not worth it as you have to set it after your opponent already had a turn to set up having already used a bunch of monsters and having several set cards including S/T hate, thus creating a wide gap in advantage and having much more resources to get rid of your SIM.
Qlimate Change
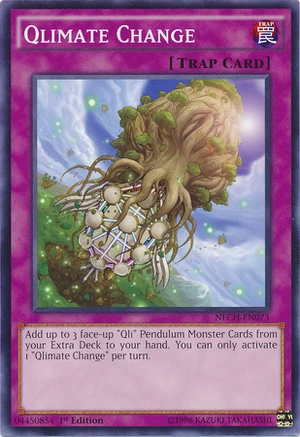
This card helps you get back your Scouts that were probably destroyed by your opponents S/T hate, as a bonus you even get more resources back like Carriers that were destroyed by battle or tributed, or Disks that also were destroyed. Don’t forget that you can search this card with Scout.
Magic Deflector
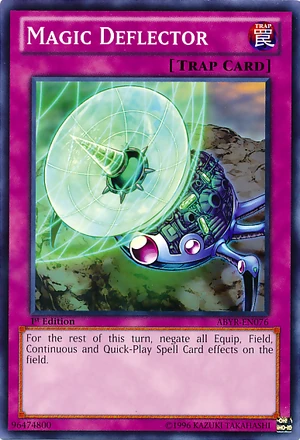
My secret tech card against MST, Spell Shattering Arrow, Saqlifice/Noble Knight Equip Spells or El Shaddoll Fusion. It negates every face-up effect of a Spell Card that isn’t a Normal, Ritual or Pendulum Spell Card (Pendulum Spell Cards are not considered as a continous Spell Card, but an own type).
Wiretap
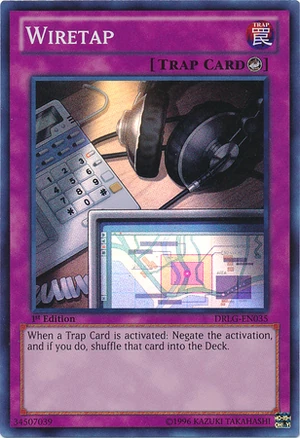
Wiretap is for decks that rely heavily on backrow or in case that I go first the second or third game, so that I can make my plays without having to fear my opponents backrow. Also good against Chain Burn and other Troll decks.
Extra Deck Choices:
Your extra deck is pretty much a toolbox that you can use when you really need it. Think of it as a an always welcome present that you didn’t expect.
I’ve used my extra deck quite often even if you won’t believe it. These are the Xyz’s that I frequently use:
- Castel
- Abyss Dweller
- Ragnazero
- Rhapsody
- Exciton
- Crazy Box
- Lavalval Chain
- Gagaga Cowboy
- Volcasaurus
- Gaia
The most spectacular thing that happened to me was when I only had 1 Helix in hand and a Saqlifice and drew a Trampolynx, while having 1 Carrier in the Extra Deck. That completely turned the tide as I could Pendulum Summon Carrier from my Extra Deck bounce Helix back into my hand with Trampolynx effect, equipped Saqlifice to Carrier, normal summoned Helix, overlayed for Excition, activating its effect while Saqlifice triggered in Grave to destroy my opponents whole field. I searched for Scout then searched for Carrier and from then on he couldn’t come back.
The point I’m trying to convey is that you shouldn’t forget your extra deck that might be able to ensure your victory. For example Ragnazero is really good in the mirror match as he will always need to equip Saqlifice or use a Pendulum scale that will boost his monsters ATK. You can abuse this and make Ragnazero to lock him down, while gaining hand advantage with Ragnazero’s effect.
In case that you’re wondering why I play Lavalval Chain: Its other effect allows me to put Scout on top of my deck, which is pretty neat in case that both players have bad hands and I only have the LV 6 monsters in my hand (that become LV 4 when normal summoned).
I never needed Dark Rebellion Xyz Dragon so I kicked him for something else, also don’t forget that you can play Ragnazero Control style in case that you have a Helix in your Pendulum Zone (Helix makes all opponents monsters lose 300 ATK, which is the condition for Ragnazero to use its effect). Best time to use would be when you have Helix and Trampolynx as you always can get rid of Helix when you need to.
Try to be careful in Game 2 and 3 when your opponent will side in S/T hate to get rid of your Scout. In case that you have a monster, S/T removal and Scout, try to bait out the Traps that aren’t S/T removal then use your S/T removal to get rid of the rest before you play Scout. Sometimes you have to consider if you can afford waiting a turn to wait your backrow to be active (e.g. Magic Deflector or Wiretap) before you use your Scout or not. If you can figure these things out, then this deck will take you pretty far even though it’s still expensive. I wish you the best luck to figure that out.
I don’t play Shell, because it doesn’t help me at all as he would just be a big beater, doesn’t have the damage output as Disk (2800 + 1800 + 1800 = 6400 / 2800 + 2800 = 5600) and I don’t need an additional Pendulum Scale of 9 as Scout already is Scale 9 same as Helix.
If you only play online or have the money and I think you will have the money if you plan on playing this deck, I would switch out 1 Enemy Controller and 2 Upstart Goblin for 3 Vanity’s Emptiness. If you want to keep the Upstarts you can also consider switching out 1 Enemy Controller, 1 Forbidden Chalice and 1 Solemn Warning (although I would keep Solemn Warning, you can also just play 2 Vanity’s Emptiness, that worked for me, too).
Qliphort (post SECE)
Decklist:

Monster (14):
3x Qliphort Scout (LV 5)
1x Qliphort Monolith (LV 5)
2x Qliphort Disk (LV 7)
2x Qliphort Alias (LV 8)
3x Qliphort Carrier (LV 6)
2x Qliphort Helix (LV 6)
1x Performapal Trampolynx (LV 2)
Spell (18):
3x Pot Of Duality
1x Forbidden Chalice
3x Mystical Space Typhoon
2x Night Beam
1x Raigeki
1x Snatch Steal
1x Book Of Moon
3x Summoner’s Art
3x Saqlifice
Trap (8):
1x Bottomless Trap Hole
1x Compulsory Evacuation Device
1x Solemn Warning
3x Skill Drain
2x Vanity’s Emptiness
Extra (15):
1x Gagaga Cowboy (R 4)
1x Number 80: Rhapsody In Berserk (R 4)
1x Abyss Dweller (R 4)
1x Daigusto Emeral (R 4)
1x Lavalval Chain (R 4)
1x Evilswarm Exciton Knight (R 4)
1x Steelswarm Roach (R 4)
1x Diamond Dire Wolf (R 4)
1x Number 82: Heartlandraco (R 4)
1x Castel The Skyblaster Musketeer (R 4)
1x Number 101: ARK Knight (R 4)
1x Number 103: Ragnazero (R 4)
1x Number 85: Crazy Box (R 4)
1x Volcasaurus (R 5)
1x Gaia The Thunder Charger (R 7)
Side (15):
1x Apoqliphort Towers (LV 10)
3x Maxx “C” (LV 2)
3x Spell Shattering Arrow
2x Chain Disappearance
2x Shadow-Imprisoning Mirror
1x Qlimate Change
1x Magic Deflector
2x Wiretap
Card Explanation
There are 3-5 cards in the next set that I think are useful in this deck. 3 are Qliphort specific cards and 2 of them are more generic cards.
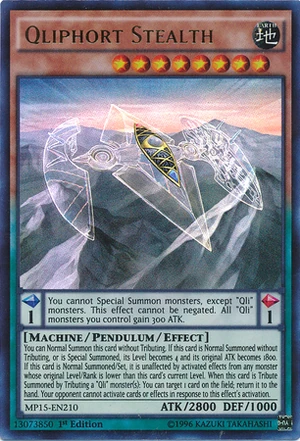
Qliphort Stealth
-
Pendulum Effect
-
You cannot Special Summon monsters, except “Qli” monsters. This effect cannot be negated. All “Qli” monsters you control gain 300 ATK.
-
Monster Effect
-
You can Normal Summon this card without Tributing. If this card is Normal Summoned without Tributing or is Special Summoned, its Level becomes 4 and its original ATK becomes 1800. If this card is Normal Summoned/Set, it is unaffected by activated effects from any monster whose original Level/Rank is lower than this card’s current Level. When this card is Tribute Summoned by Tributing a “Qli” monster(s): You can target 1 card on the field; return it to the hand. Your opponent cannot activate cards or effects in response to this effect’s activation.
This card’s effect looks not very powerful at the first glance, but if you think about it or test it, you will see it’s really strong, as your opponent won’t be able to chain anything to this effect and it can bounce every card on the field, that means you can either clear your opponents backrow/monsters or bounce your own cards like Vanity’s Emptiness or your own Scout. In addition to that you can put Helix/Carrier on Chain Link 1 so that you get more of Stealth Superpolymerisation-like effect. Unfortunately effects like Cir or Graff will activate in a separate chain, so it will still activate.
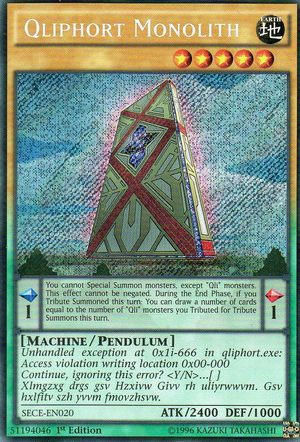
Qliphort Monolith
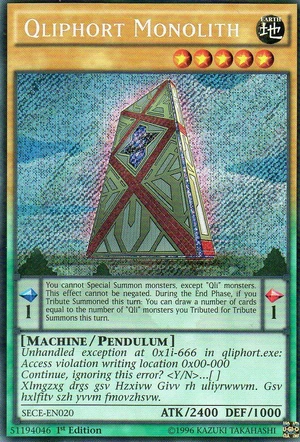
- Pendulum Effect
- You cannot Special Summon monsters, except “Qli” monsters. This effect cannot be negated. During the End Phase, if you Tribute Summoned this turn: You can draw a number of cards equal to the number of “Qli” monsters you Tributed for Tribute Summons this turn.
- Monster Effect
- Unhandled exception at 0x1i-666 in qliphort.exe: Access violation in writing location 0x00-000
Ignore the error and continue? <Y/N>…[ ]
Xlmgzxg drgs gsv Hzxivw Givv rh uliyrwwvm. Gsv Hxlfitv szh yvvm fmovzhsvw.
Monolith is a Scale 1 Normal Monster with LV 5, which means that you can now search for Monolith with Summoner’s Art, too. The stats of 2400/1000 aren’t bad too, as the ATK won’t go down to 1800 when it is pendulum summoned (in case that it was destroyed and is face-up on your Extra Deck, I wouldn’t Special Summon it in any other case from hand except when going for game).
Its Pendulum effect is kind of like Super Rejuvenation, but only for Tribute Summons. I haven’t used Monoliths effect that much as in most cases where I had this guy, I had an OTK, but it’s definitely worth a try as you can also play a control style with Alias and Carrier/Helix supported by Vanity’s Emptiness rather than trying to go for game with the Disk play. If I go for game I would rather have Carrier, Disk or Alias as a Pendulum 1 Scale, because they give me a 300 ATK boost, that is clearly better than a draw that you would never get when everything goes right. You should also just play 1 Monolith, maximum 2 because same as Trampolynx you don’t want to have this in your starting hand without Scout and you definitely don’t want to have multiple copies in your hand. The fact that you can search for this card with Scout, Summoner’s Art and Saqlifice makes it even less important to play more than just 1 copy. Like Trampolynx it’s just a win-more card.
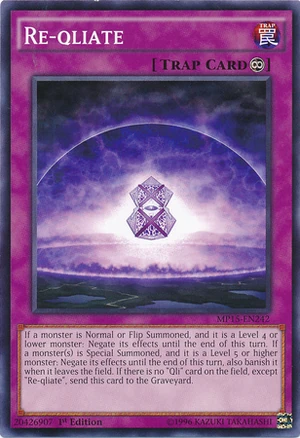
Re-Qliate

When a Level 4 or lower monster is Normal or Flip Summoned: Negate its effects until the end of this turn. (This negation remains even if this card leaves the field.) When a Level 5 or higher monster(s) is Special Summoned: Negate its effects until the end of this turn, also banish it when it leaves the field. (This negation remains even if this card leaves the field.) If the only “Qli” cards on the field are “Reqliphort”, send this card to the Graveyard.
It’s certainly a cool card and it’s searchable with Scout but I would probably only play Re-Qliate in the side deck, as it’s kind of like Vanity’s Emptiness and doesn’t work on Xyz or monsters that are already on the field. The only decks that this card is good against is Shaddoll and Nekroz, maybe some rogue decks, too.
Soul Transition
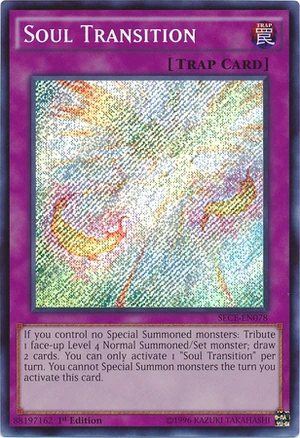
If you control no Special Summoned monsters: Tribute 1 face-up Level 4 Normal Summoned/Set monster; draw 2 cards. You can only activate 1 “Soul Transition” per turn. You cannot Special Summon the turn you activate this card.
This card serves the same purpose as Enemy Controller but it’s slightly better, as your opponent doesn’t have to have a monster on the field and you don’t lose any card advantage. The only thing is that you lose field presence and can’t use it when you have special summoned monsters. 2 copies of this card are good, but I can’t find the space to add this card.
Pot Of Riches
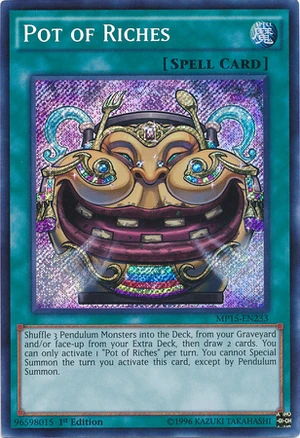
Shuffle 3 Pendulum Monsters into the Deck, from your Graveyard and/or face-up in your Extra Deck, then draw 2 cards. You can only activate 1 “Pot of Riches” per turn. You cannot Special Summon the turn you activate this card, except by Pendulum Summon.
A new pot! And it’s good! I don’t know what Konami was thinking when they created this card, but I’m happy to have it, although I would probably only play it in my side deck as the only good moment to play it would be during mid or late game, when you want to shuffle back your Disk/Alias/Scout, might be good in a deck that tries to grind with with Vanity’s Emptiness/Alias and stuff. I wouldn’t play it in an agressive build, only in the side deck as in game 2 and 3 you will lose much more Scouts due to the sided Spell and Trap hate.
Strategy
So if you still don’t know what to do in this deck after all this explanation here’s what you have to do:
- Search for Scout (if you already have one pretend that you don’t have one and search another)
- Look at your hand: If you have Carrier/Helix in hand, then search Saqlifice, if you have Saqlifice, then search Carrier, if you only have Disk or Alias as your only monster in your hand, then search Saqlifice
- Normal Summon your monster
- Equip Saqlifice
- Set some Backrow and wait a turn
- Search for Disk, if you already have one then search for Saqlifice
- Normal Summon Disk
- Activate Disk’s effect
- Special Summon 1 Helix and 1 Carrier (or any other combination of Qliphort monsters depending on your field and hand)
- Win the game
Thanks for reading, see you next time with an in-depth analysis of the upcoming Nekroz and after that I’ll give you a deck review of the Burning Abyss Deck, that is rampaging in the TCG right now.
Kahzel